How to Install Remote Desktop ( RDP ) on Centos vps
How to Install Remote Desktop ( RDP ) on Centos vps
In this small tutorial we are going to learn how to install an rdp ( remote desktop ) on a linux vps with centos operating system installed. Linux remote desktop has a graphical interface like windows and loads and works faster than a windows rdp. And in this way you can get an rdp for even quarter of the price that you will be paying for a windows rdp.The only consideration is that your vps should have a minimum guaranteed ram of 512 mb and burstable ram of more than 700 mb. Now you can follow this step by step tutorial to install your remote desktop on your Centos vp
Step 1: Download an install putty . This is a utility which you will use to send remote commands to your vps for installing rdp. You can download putty from here. When you will run putty , it will open a window like this.Where you enter the ip address of your vps which your host gave you and click on open.

Step 2:
In the next window login as root and supply your root password. This will log you as root into your vps.

Step 3:
The next steps assume that your centos comes with YUM already installed. You may check if it is installed or not by issuing the following command in ur putty window.
If the output is something like this window , then it is ok otherwise contact your hosting provider to isntall yum for you. They can do it in two seconds and they should have included it in the first place.

Step 3:
Now we are using the command to install genome desktop enviroment which will install graphical environment on your vps . Issue the following command in the putty window.
This will take quite some time ( around 10-15 ) minutes , depending upon the speed of your vps. Please wait for it to finish. After the command executes successfully , issue the following command.
This will update your system.
Step 4:
Now we will install NX/FreeNX server in vps which will act as our server when in the next steps we connect to this vps as rdp. More information about NX server and client can be found here. In your putty window , issue the following command.
[/FONT]
When this command executes successfully , you again issue the yum update command.
yum update Now restart your server and issue the following command.
This will restart your server in about two minutes time. You will have to close the putty window and again start putty and connect to your server as in Step 2 above. We will be needing something from this putty window one final time in a while.
Step 5:
Now go here and download NX client for windows and install it.

Now run nx client from programs and a window like this will open.Enter in the Host box your IP address of vps , Select Gnome as desktop and display area as Available Area and move to next step without pressing any other button.

Step 6:
Go to your putty window and issue the following command.
Now copy the resulting dsa key with Control + C . The area to be copied is shown as grey area in the following picture.

Now go to the nomachine client window that we have left opened in Step 5 and click on key and paste the copied text from putty window in place of the already existing default key there.

Click Save and Then Click OK. It will open a window like this.

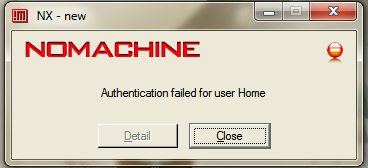
Enter your user name as root and your root password and click login. And if you followed me correctly , you will soon see a screen like this.

And then finally your centos remote desktop screen like this:

Final ScreenShot :

Source
Hope you liked the tutorial and it was of some use for you. Do contact me in case of any queries.
How to Install Remote Desktop ( RDP ) on Centos vps
In this small tutorial we are going to learn how to install an rdp ( remote desktop ) on a linux vps with centos operating system installed. Linux remote desktop has a graphical interface like windows and loads and works faster than a windows rdp. And in this way you can get an rdp for even quarter of the price that you will be paying for a windows rdp.The only consideration is that your vps should have a minimum guaranteed ram of 512 mb and burstable ram of more than 700 mb. Now you can follow this step by step tutorial to install your remote desktop on your Centos vp
Step 1: Download an install putty . This is a utility which you will use to send remote commands to your vps for installing rdp. You can download putty from here. When you will run putty , it will open a window like this.Where you enter the ip address of your vps which your host gave you and click on open.
Step 2:
In the next window login as root and supply your root password. This will log you as root into your vps.
Step 3:
The next steps assume that your centos comes with YUM already installed. You may check if it is installed or not by issuing the following command in ur putty window.
Code:
[FONT=Arial] yum [/FONT]If the output is something like this window , then it is ok otherwise contact your hosting provider to isntall yum for you. They can do it in two seconds and they should have included it in the first place.
Step 3:
Now we are using the command to install genome desktop enviroment which will install graphical environment on your vps . Issue the following command in the putty window.
Code:
yum groupinstall 'GNOME Desktop Environment' 'X Window System'This will take quite some time ( around 10-15 ) minutes , depending upon the speed of your vps. Please wait for it to finish. After the command executes successfully , issue the following command.
Code:
[FONT=Arial] yum update[/FONT]This will update your system.
Step 4:
Now we will install NX/FreeNX server in vps which will act as our server when in the next steps we connect to this vps as rdp. More information about NX server and client can be found here. In your putty window , issue the following command.
Code:
[FONT=Arial] yum install nx freenxWhen this command executes successfully , you again issue the yum update command.
yum update Now restart your server and issue the following command.
Code:
[FONT=Arial] shutdown -r now [/FONT]This will restart your server in about two minutes time. You will have to close the putty window and again start putty and connect to your server as in Step 2 above. We will be needing something from this putty window one final time in a while.
Step 5:
Now go here and download NX client for windows and install it.
Now run nx client from programs and a window like this will open.Enter in the Host box your IP address of vps , Select Gnome as desktop and display area as Available Area and move to next step without pressing any other button.
Step 6:
Go to your putty window and issue the following command.
Code:
[FONT=Arial] cat /var/lib/nxserver/home/.ssh/client.id_dsa.key [/FONT]Now copy the resulting dsa key with Control + C . The area to be copied is shown as grey area in the following picture.
Now go to the nomachine client window that we have left opened in Step 5 and click on key and paste the copied text from putty window in place of the already existing default key there.
Click Save and Then Click OK. It will open a window like this.
Enter your user name as root and your root password and click login. And if you followed me correctly , you will soon see a screen like this.
And then finally your centos remote desktop screen like this:
Final ScreenShot :
Source
Hope you liked the tutorial and it was of some use for you. Do contact me in case of any queries.
Last edited:
")
 . Any solution for this ?